Volunteer data tracking is crucial for understanding the impact of your nonprofit’s volunteer efforts, improving engagement, and making informed decisions. First, it’s important to note that there are many different volunteer metric tracking software options available, and there are countless metrics you could track. There are also many ways to go about collecting and analyzing this data. However, if you want to start tracking today—this moment—this guide provides the most straightforward, minimalistic, and free way to do so using Google Forms and Google Sheets.
step 1
Identify the First Metrics to Track
The first metric you should track is volunteer hours logged. This is the most fundamental metric because it provides valuable insights into your nonprofit’s operations.
Many people might think, “I can just remember who my most dedicated volunteers are.” And while that may seem true in the short term, relying on memory is not a scalable or reliable way to track volunteer engagement. Our brains aren’t wired to accurately retain and analyze large amounts of data over time. Your perception of volunteer participation might change, and without real numbers, you could overlook valuable insights. Once you start looking at actual data, you will likely uncover patterns and trends you never noticed before. Tracking volunteer hours allows you to make informed decisions rather than relying on gut feelings.
Here’s why tracking volunteer hours is essential:

Report Volunteer Impact to Funders and Stakeholders
Funders and board members want to see the return on investment (ROI) of volunteer programs. If you can show that your volunteers contributed 100 hours while you only spent 10 hours managing them, you demonstrate efficiency and impact. This data helps justify funding requests and budget allocations for volunteer management.

Understand Peak Engagement Times and Trends
By tracking hours over time, you can identify which months or events attract the most volunteers. This allows you to plan resources accordingly, ensuring high-demand periods are well-staffed.

Identify Your Most Dedicated Volunteers
Recognizing and rewarding top contributors can boost retention and morale. You can create “milestone awards” for volunteers who reach a certain number of hours.

Estimate the Value of In-Kind Contributions
Volunteer hours can be translated into a monetary value based on industry rates. Some grants require this data as part of funding applications.
step 2
Set Up Google Forms and Connect It to Google Sheets
Now that your spreadsheet is structured and optimized, the next step is to make data entry as seamless as possible. Google Forms allows volunteers to quickly log their hours, and because it syncs directly with Google Sheets, the data will be automatically organized without manual input. This ensures accuracy, reduces administrative work, and makes tracking effortless. Follow these steps to set up your Google Form and link it to a spreadsheet.
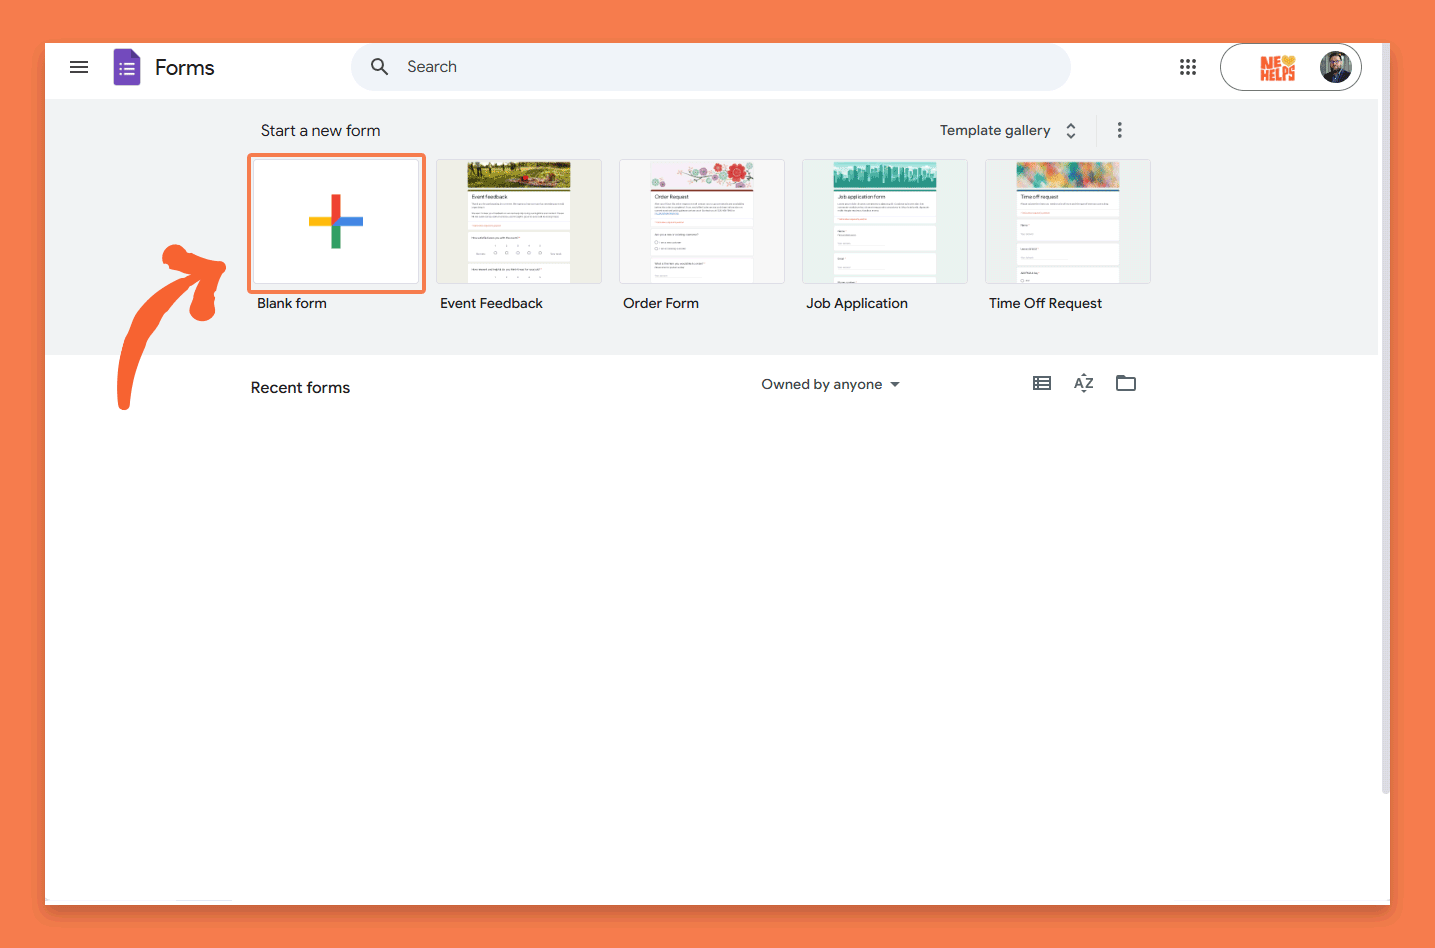
1. Open Google Forms
Navigate to Google Forms and create a new form by clicking on ‘Blank Form’.
2. Add Your Fields
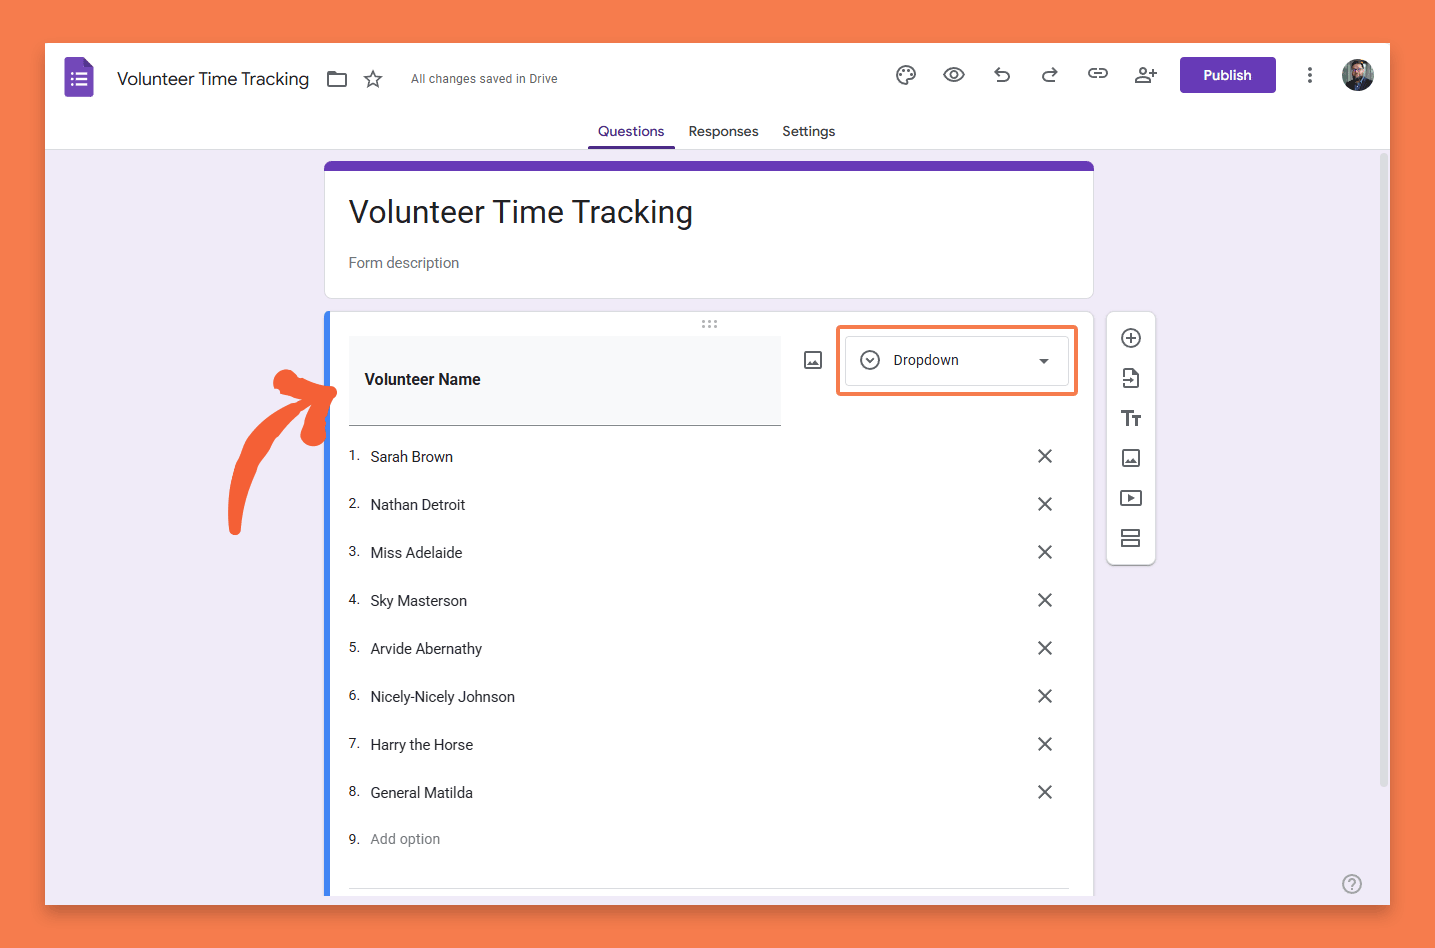
Tip: For any fields with multiple options, you can copy and paste a list, and Google Forms will automatically add each item as a selectable option.
- Volunteer Name (Use a dropdown list if you have a known roster to minimize errors.)
- Date of Service
- Hours Worked
- Activity or Role (Dropdown list to ensure standardized responses.)
- Have You Volunteered With Us Before? (Yes/No)
- Any Notes or Feedback? (Optional)
3. Finalize Your Form
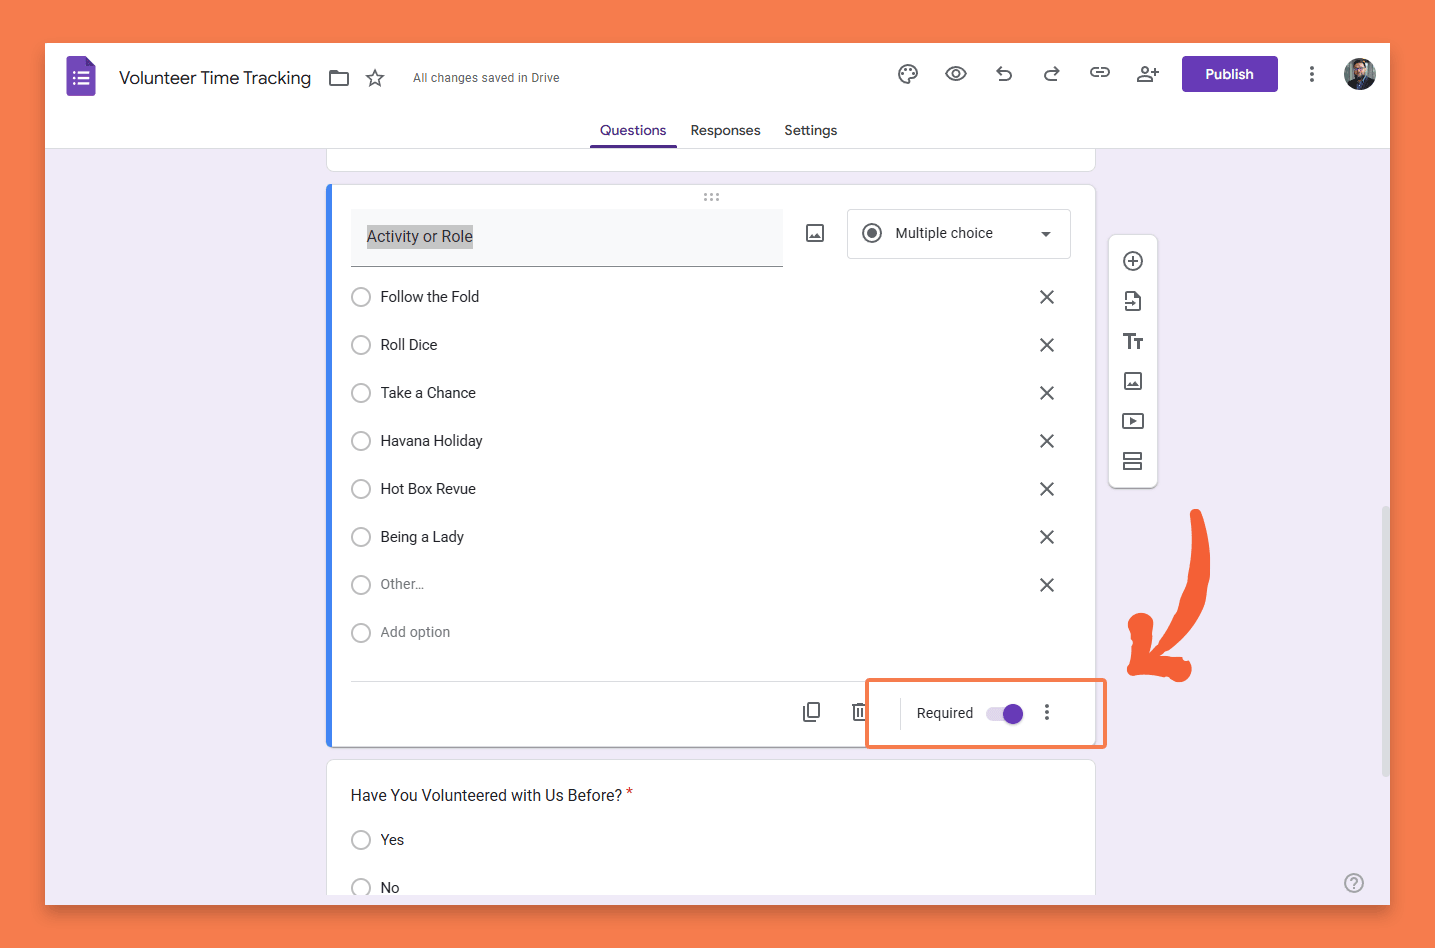
- Ensure key fields are set to Required to prevent missing data.
- Name your form something clear and descriptive, such as Volunteer Hours Log.
- Add a short description at the top of the form explaining its purpose.
- Preview the form and test it by submitting a sample entry to ensure everything works as expected.
4. Connect the Form
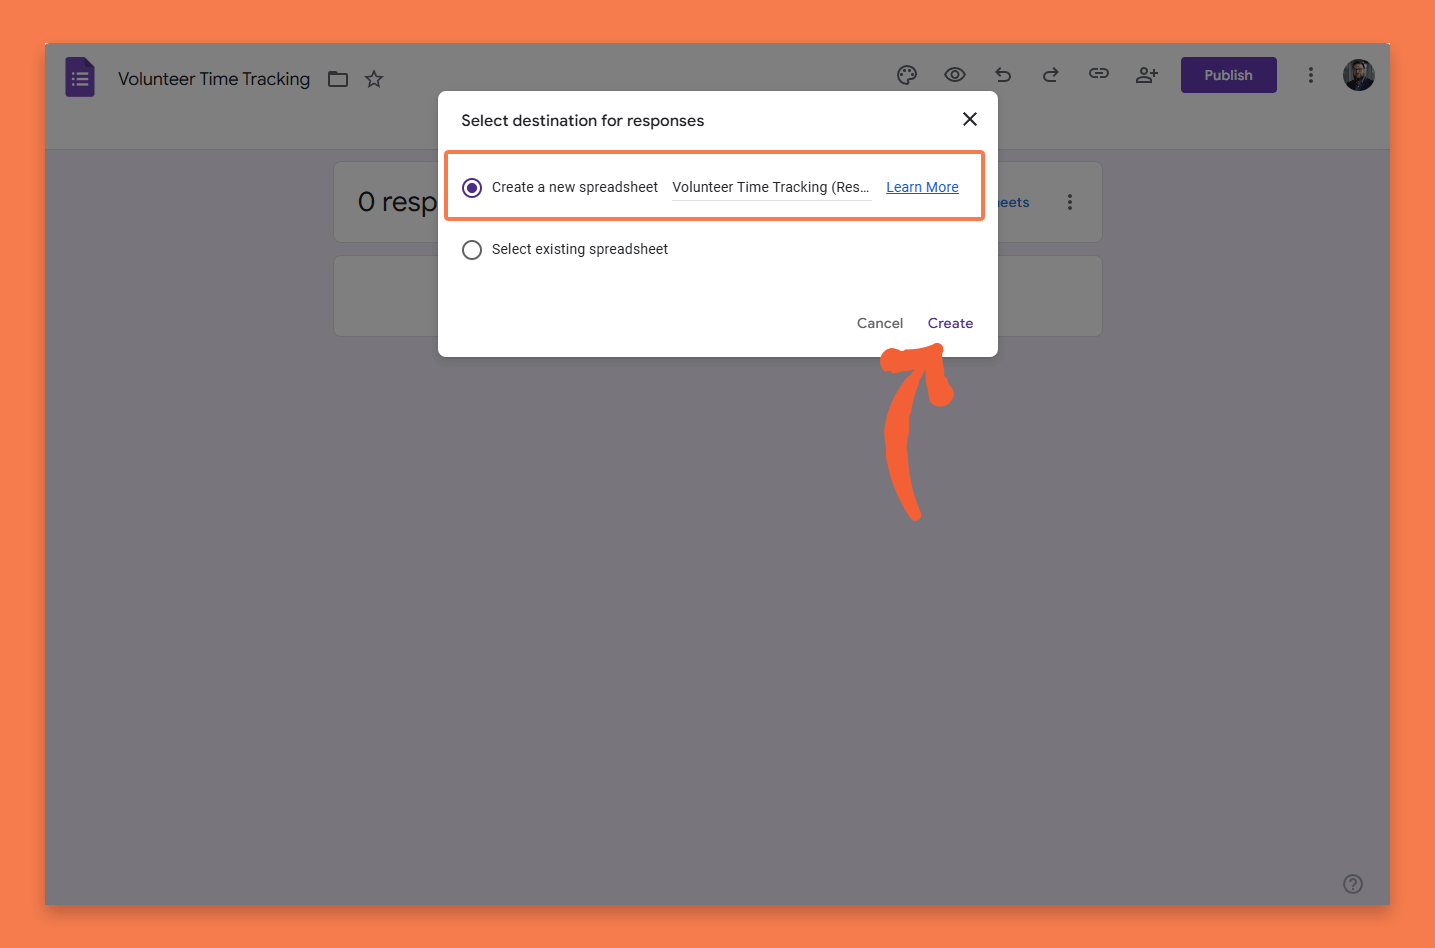
Connect the form to the Google Sheet created earlier:
- Click Responses in Google Forms.
- Click the Google Sheets icon to link the responses to your tracking spreadsheet.
- Select ‘Create a new spreadsheet‘ and then ‘Create‘. You will then be brought to the newly created spreadsheet to continue.
step 3
View and Test Your Spreadsheet
Before collecting real responses, you need to ensure your form is ready to accept submissions and that the data flows correctly into your spreadsheet. Google Forms automatically creates a structured sheet, but it’s important to verify that everything works as expected.
1. Publish Your Form
- In Google Forms, click the Publish button.
- Follow the modals and ensure the form is accepting responses from the desired individuals (or set it to everyone).
- Once its published click the ‘Copy responder link‘ button and paste that in your browser (or click on the preview ‘eye‘ icon button in the form interface).
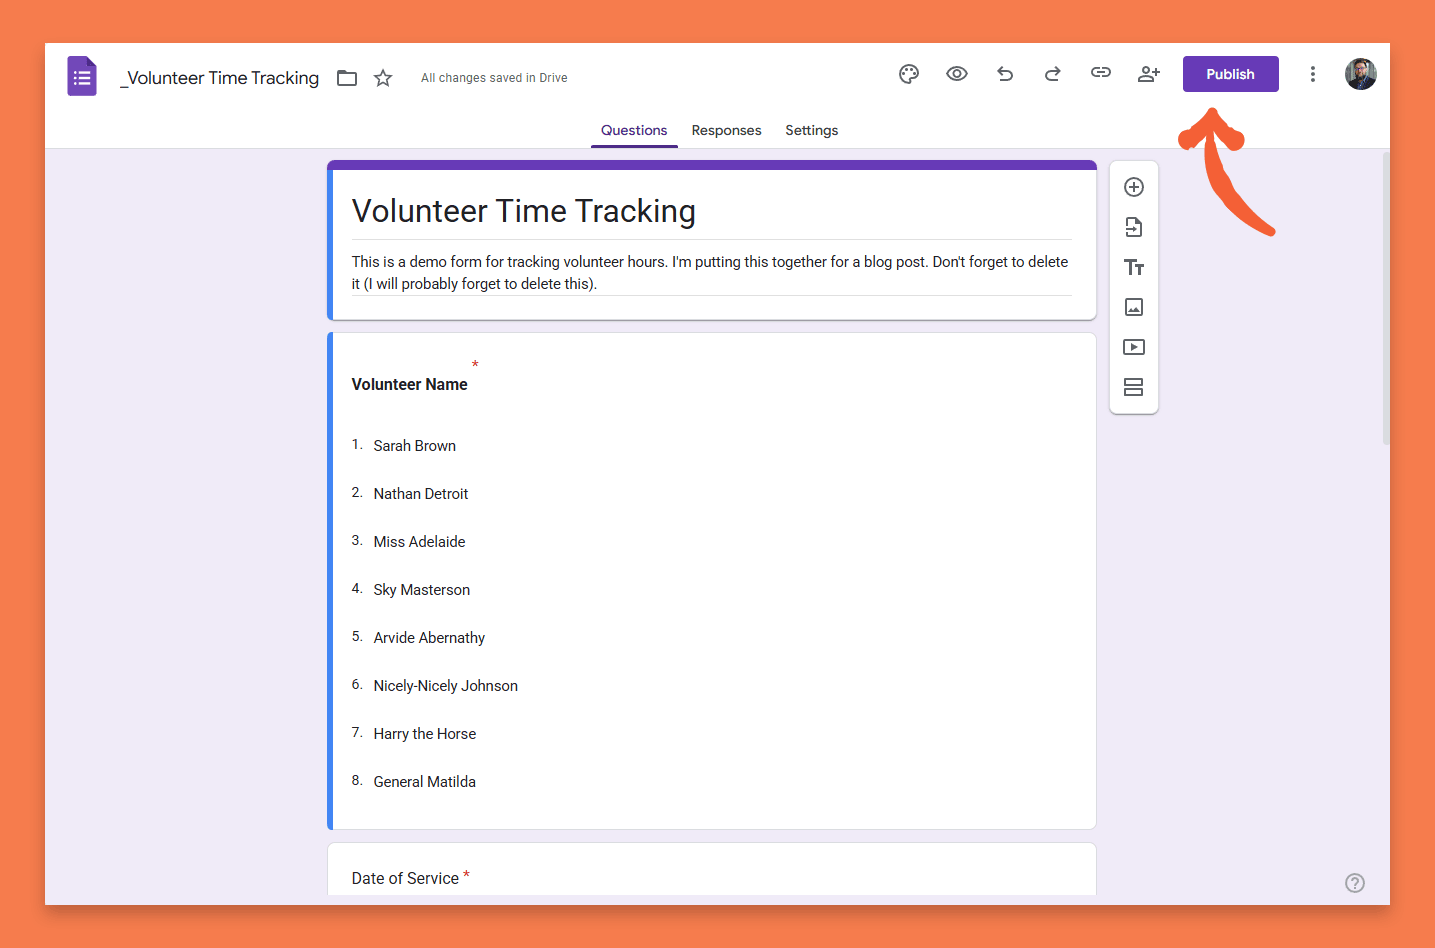
2. Submit a Test Entry
- Open your published Google Form and fill out a sample submission.
- Ensure that all required fields are functioning properly and that the form submits successfully.
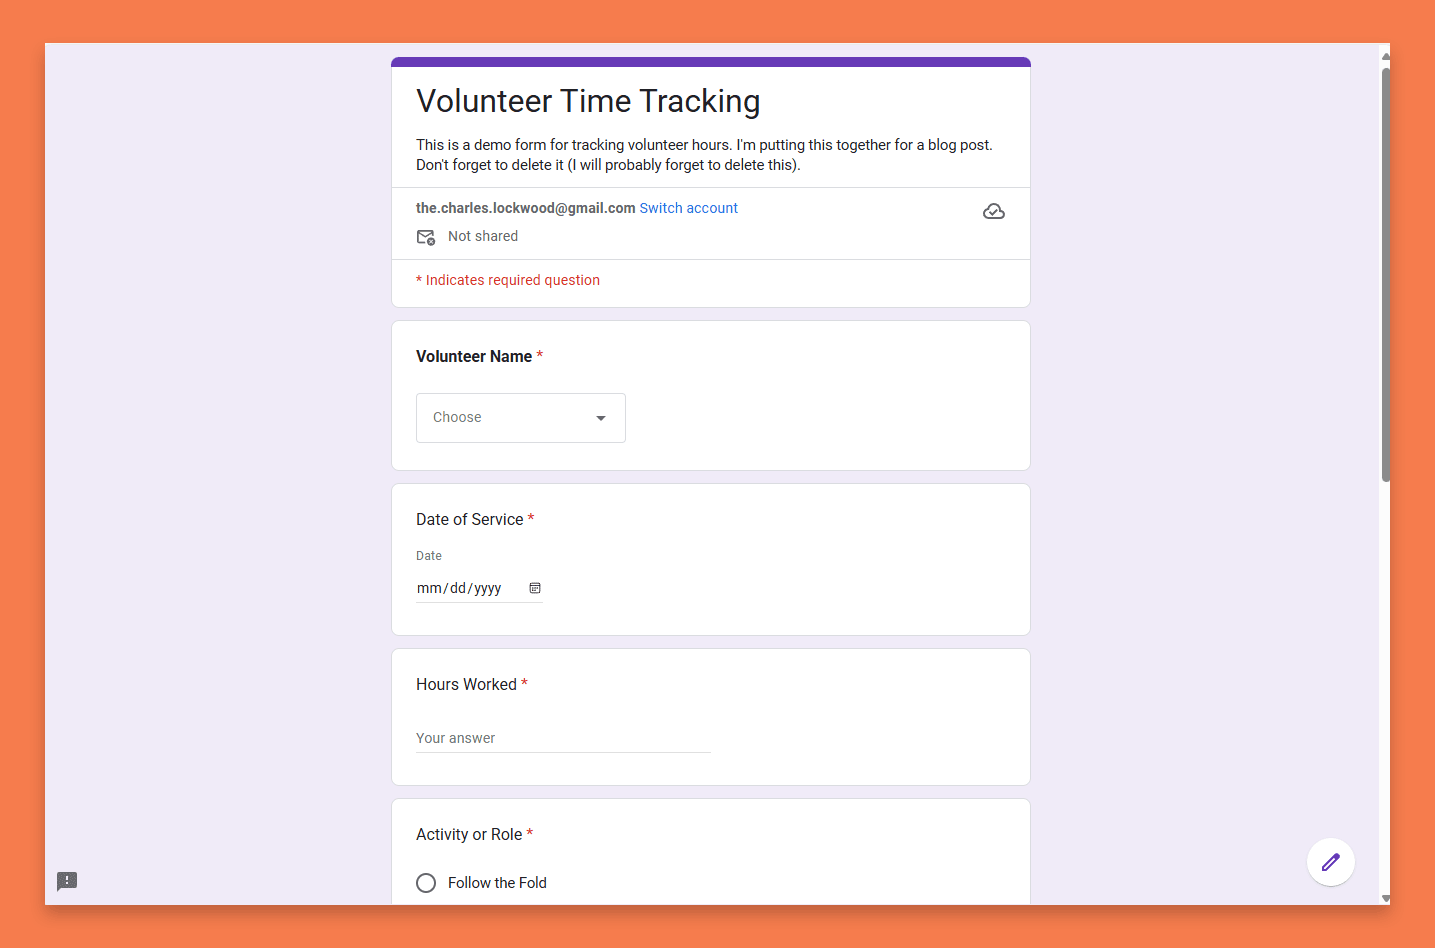
3. Verify Data in Your Spreadsheet
- Open your linked Google Sheet and confirm that the test data appears in the correct columns.
- Review column names and ensure they align with the form fields.
- Look for any formatting issues or missing data.
- Once you’ve verified that everything is working correctly, you’re ready to share the form.

4. Share the Form with Volunteers
Once your Google Form is set up, you need to make it accessible to volunteers. Here are the best ways to share it:
- Email the Link: Send it directly to your volunteer list.
- Embed on Your Website: Use the embed code from Google Forms so volunteers can fill it out without leaving your site.
- Generate a QR Code: Print the QR code at events so volunteers can scan and submit their hours instantly.
- Post on Social Media: Share the link in volunteer groups or pages to increase participation.

take it further
Next Steps and Scaling Your Volunteer Tracking System
Now that you have a functional volunteer tracking system in place, you can leverage this data to improve your nonprofit’s operations. Here are some ways to enhance and expand upon what you’ve built:
Automate Your Volunteer Communications
Use Zapier or similar automation tools to connect your Google Sheets to a CRM or Volunteer Management System (VMS). This allows you to automatically send thank-you emails or reminders to volunteers to log their hours.
Schedule Automated Reminders
Set up automated emails in your VMS or CRM to remind volunteers to log their time at the end of their shift, ensuring you capture as much data as possible.
Make Your Form Easily Accessible
Embed the Google Form on your website at a user-friendly URL like nonprofit.org/volunteer-hours to make it easy for volunteers to submit their time.
Analyze and Act on Your Data
Use Google Sheets’ built-in reporting tools, such as pivot tables and charts, to gain deeper insights into volunteer engagement patterns. This can help in recognizing trends, rewarding top volunteers, and making data-driven program decisions.
Expand Beyond Basic Hours Tracking
Once comfortable, you can expand the form to track additional volunteer data like skills, interests, or specific event participation to optimize engagement and volunteer placement.
By continuously refining your tracking system and integrating automation, you’ll be able to streamline volunteer management, improve engagement, and demonstrate measurable impact to stakeholders and funders.
Keep in Mind:
Measure Volunteer Impact Beyond Hours
While tracking hours is a great starting point, explore methods to measure qualitative impact, such as testimonials or skill development.
Choose the Right VMS Platform for Your Needs.
Not all volunteer management systems are the same. Research and select one that aligns with your organization’s goals and capacity.
Explore Discord for Volunteer Communication
Discord has proven to be a great tool for volunteer engagement, especially because it’s free and allows for community building.
The Importance of Regular Updates
Keeping volunteers informed and up-to-date with the organization’s progress is critical to maintaining their engagement.